|
PC Carbine with Magpul Stock Buttstock Magazine Pouch installation instructions - Right Handed Shooter
PC Carbine with Magpul Stock
Buttstock Magazine Pouch (BMP) Installation Instructions - Right Handed Shooter - 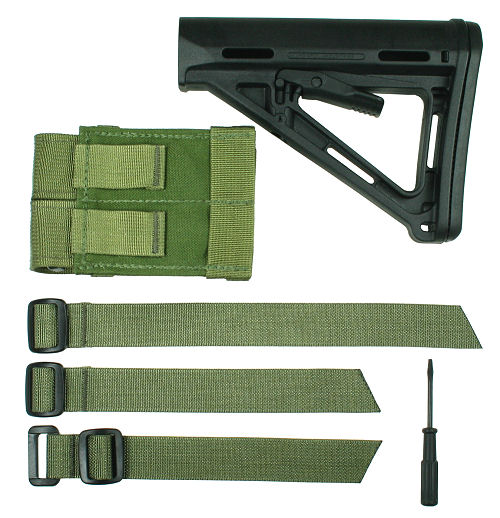
Within this package you should receive the Buttstock Magazine Pouch, one (1) rear slider strap, one (1) long attachment strap and one (1) short attachment strap. A small blunt tip tool such as the screwdriver pictured will be helpful in routing the attachment strap. The Magpul MOE buttstock has been removed from the PC Carbine for better illustration purposes. It does not need to be removed from your carbine to install the pouch. However, as a reminder be sure to unload and clear your firearm before installing this item.
Step 1 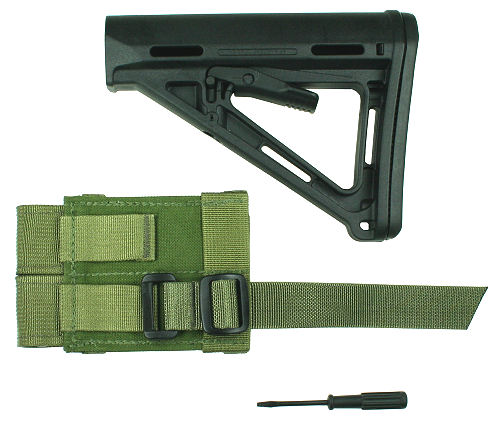
With the Tri-Glide facing up, insert the tip on the rear slider strap through the lower vertical webbing slot.
Step 2 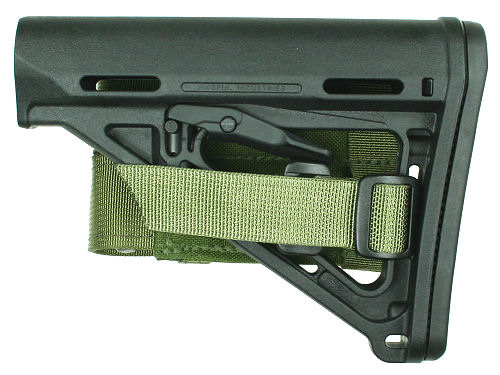 Route the tip through the vertical slot on the stock and then through the Tri-Glide on the rear slider. Step 3 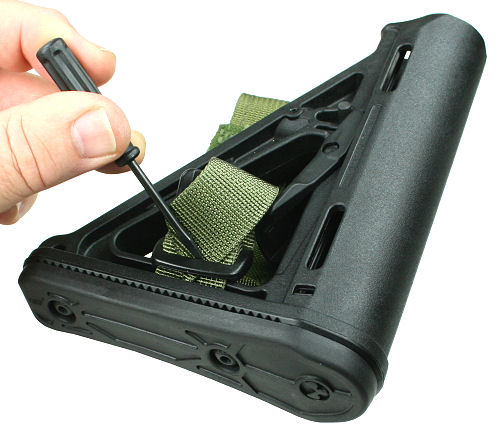 Using the tip of a small flat bladed screwdriver, carefully route the tip of the rear slider back through the Tri-Glide. Step 4 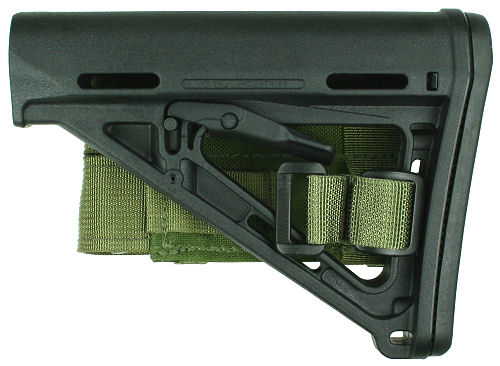 Route the excess strap webbing through the stock slot. It can be further routed and retained under the webbing slot on the pouch. Step 5  Insert the tip of the shorter of the two remaining attachment straps through the center stock opening and under the lower front horizontal webbing slot. Step 6 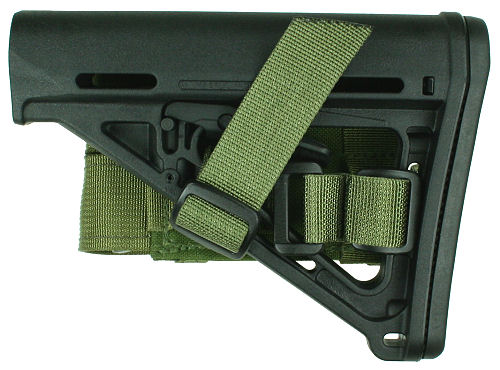 Route the tip through the Tri-Glide on the attachment strap and pull snug. Step 7 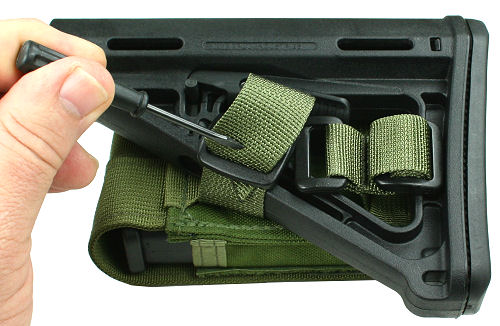 Using the tip of a small flat bladed screwdriver, carefully route the tip of the attachment strap back through the Tri-Glide. Step 8 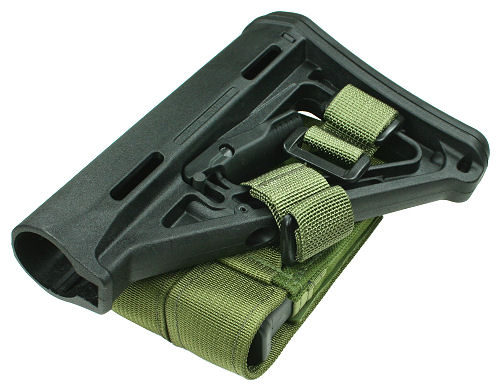 Route the excess webbing under the pouch webbing slot and rotate the attachment strap so that the Tri-Glide rests under the buttstock. Step 9 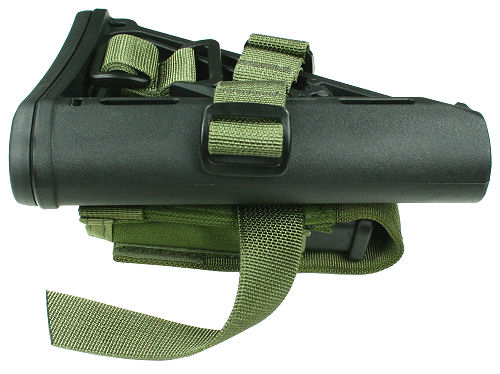 Insert the tip of the of the last remaining (long) attachment strap through the center stock opening and under the upper front horizontal webbing slot. Step 10 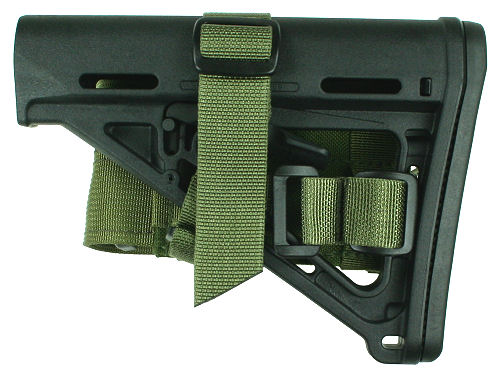 Route the tip through the Tri-Glide on the attachment strap and pull snug. Step 11 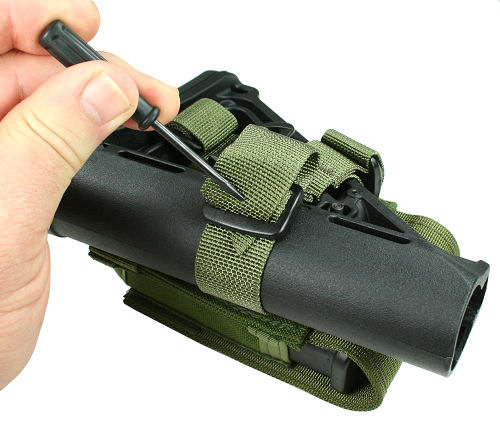 Using the tip of a small flat bladed screwdriver, carefully route the tip of the attachment strap back through the Tri-Glide. Step 12 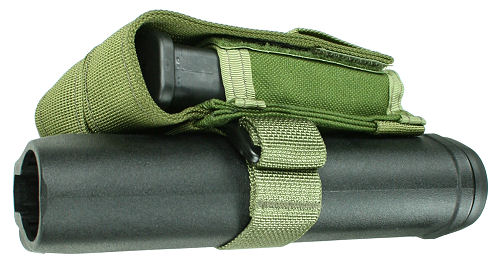 Route the excess webbing under the pouch webbing slot and rotate the attachment strap so that the Tri-Glide rests against the pouch. DONE 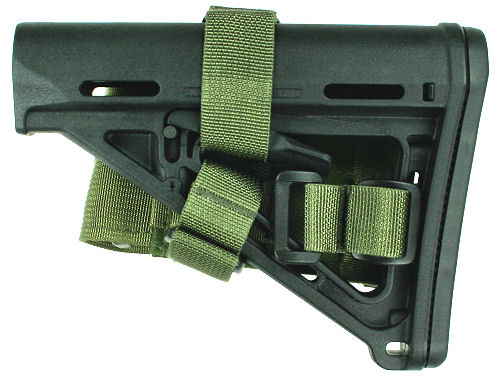 |